![[Demo] How to Automate F5 Certificate Management](https://www.keyfactor.com/wp-content/uploads/Big-IP-F5-blog-img.png)
Enterprises today run on applications, but keeping those applications up and running is a constant challenge, not to mention the task of securing them.
To deliver applications reliably and securely, networks now need to handle serious volumes of application traffic and secure the infrastructure behind it. That’s where F5 BIG-IP application services provide critical functions like load balancing, encryption and acceleration to ensure application uptime and security.
If you’ve deployed multiple BIG-IP appliances in your network, you know that SSL certificates play a key role to secure and authenticate communications, but you also need to ensure that every certificate is:
- Deployed and installed in the correct location;
- Valid and up to date with security policies;
- Issued from a trusted source (internal or public CA); and
- Managed across all F5-BIG devices through its lifecycle
Few organizations have a good process in place for F5 certificate management. Despite tools available out there (hint: Keyfactor Command), most organizations still default to management by spreadsheet and manual methods to request and renew certificates.
Challenges of F5 Certificate Management
As you may have already experienced, inefficient F5 certificate management processes open your organization up to increased risk of disruptive outages and network blind spots that result from expired or misconfigured certificates. It really boils down to three challenges.
Limited Visibility
If you have multiple F5 appliances, each with dozens of partitions where certificates could be installed, it becomes really difficult to gain visibility and keep pace with renewals. F5 and network admins simply don’t have the time to login to each F5 device to inventory certificates and all of their details (I.e. expiry, key size, algorithm, etc.) on a regular basis.
Manual Processes
Manually requesting and installing certificates into multiple F5 devices and partitions isn’t just time-consuming, it’s also prone to error and oversight. It often takes admins about 10-15 minutes to deploy each certificate, not to mention the time it takes to submit a certificate signing request (CSR) and retrieve the certificate.
Lack of Reporting
That leads us to the final challenge – ensuring that every certificate is in line with security requirements. Manual processes often lead network admins to use shortcuts instead, like issuing self-signed or wildcard certificates, which saves them time, but it also creates security risks and lowers assurance levels.
To prevent these risks and avert unnecessary challenges, PKI and security teams need to adopt a more automated and centralized approach. By combining centralized visibility, policy enforcement, and automated provisioning and renewal, Keyfactor Command simplified F5 certificate management and helps you avoid unexpected downtime.
Demo: F5 Certificate Management
To learn more about the importance of keys and certificates in F5 deployments, how to avoid costly downtime, and how Keyfactor enables automated F5 certificate management, watch our 30-minute on-demand webinar.

How to Inventory F5 Certificates
To inventory certificates, you’ll first create certificate stores on the Keyfactor Command server. In this case we‘ll first add the F5 web server.
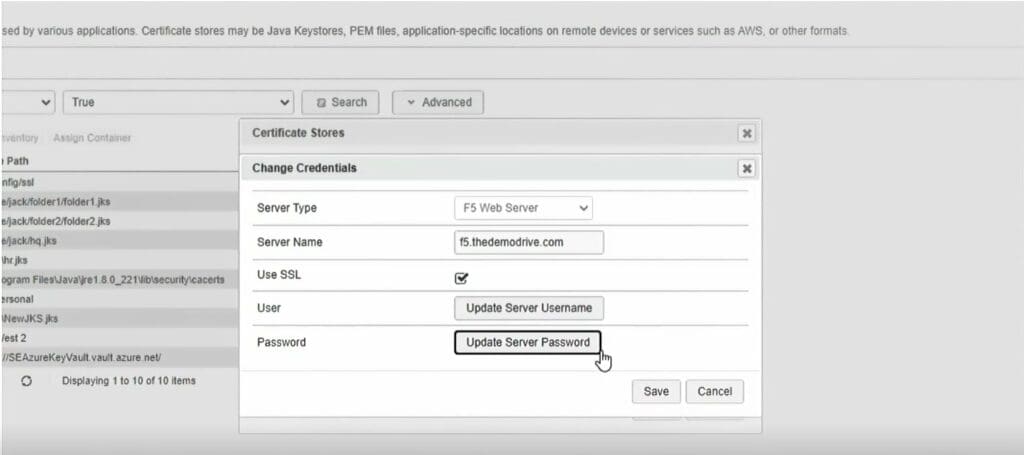
We’ll start by creating a container (a group of certificate stores), enter the F5 server name in order to connect via the API, and provide the credentials to authenticate and communicate with the server.
You can either enter the username and password or load the credentials from a PAM provider like CyberArk or Thycotic.
Enter the password, confirm and save the information. This will be stored in a Keyfactor secrets database or in the PAM provider, should you choose.
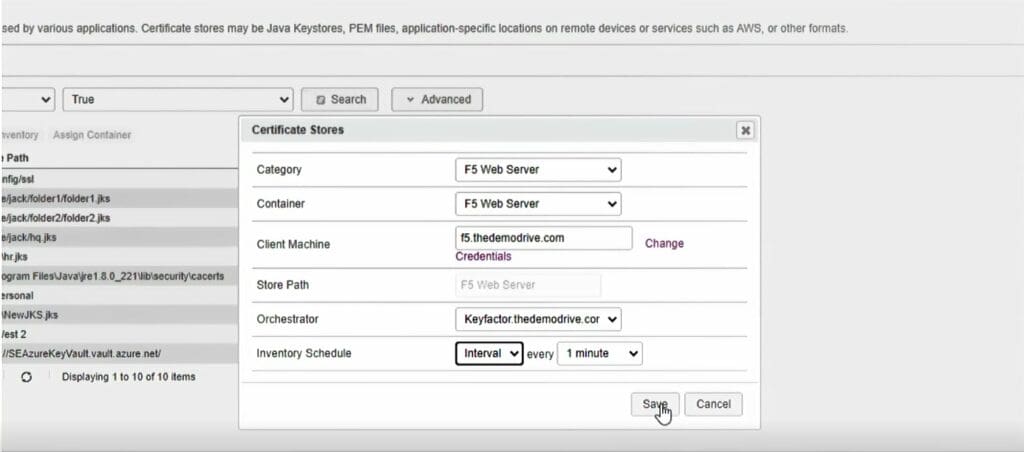
Next, we’ll select the orchestrator you’ve deployed in your environment to inventory and manage certificates on F5 devices — in this case, we’ll choose the orchestrator on this Keyfactor Command server – and then we’ll set an interval schedule to check in with the certificate store.
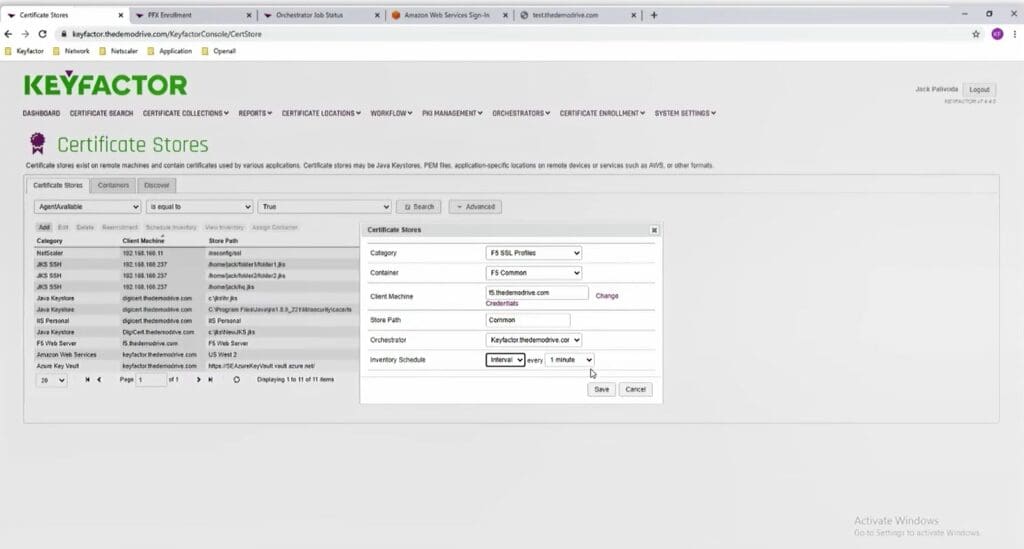
We’ll then select an F5 SSL Profile, which represents a specific partition that’s on the F5 appliance. In this case, we’ve called it a F5 common.
Enter the client machine in again. The credentials will auto-populate since you’ve already entered those. Then you’ll enter the Store Path, which is the particular partition you’ll connect to, and the orchestrator and interval.
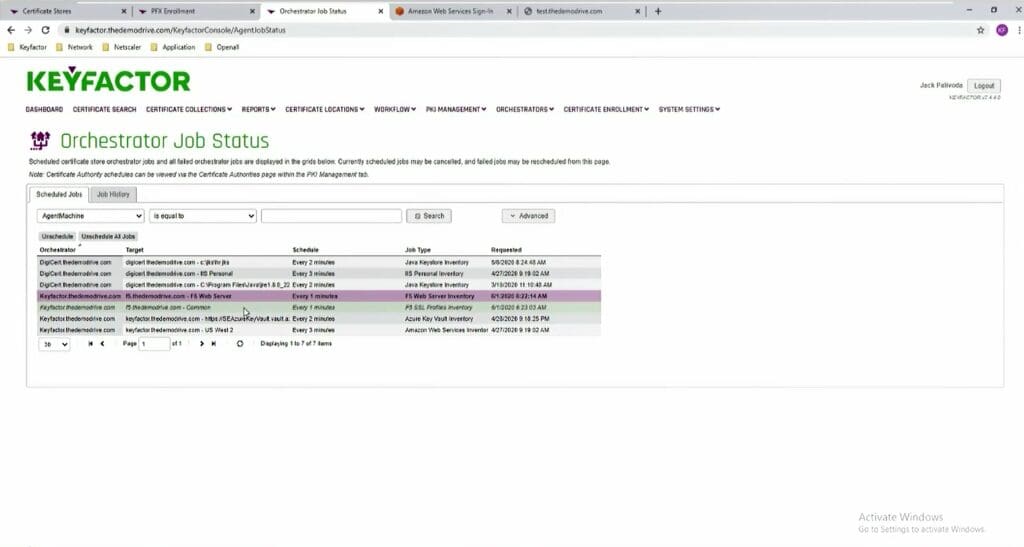
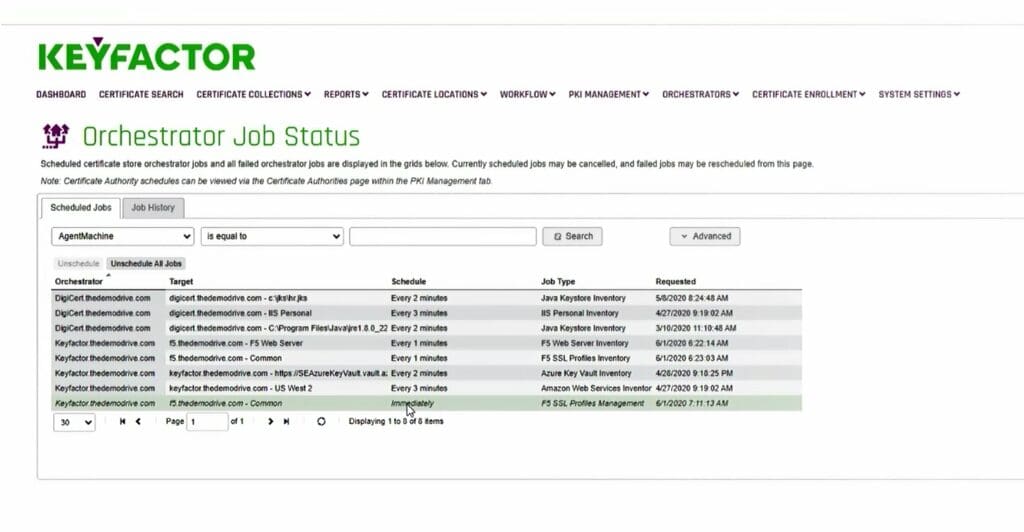
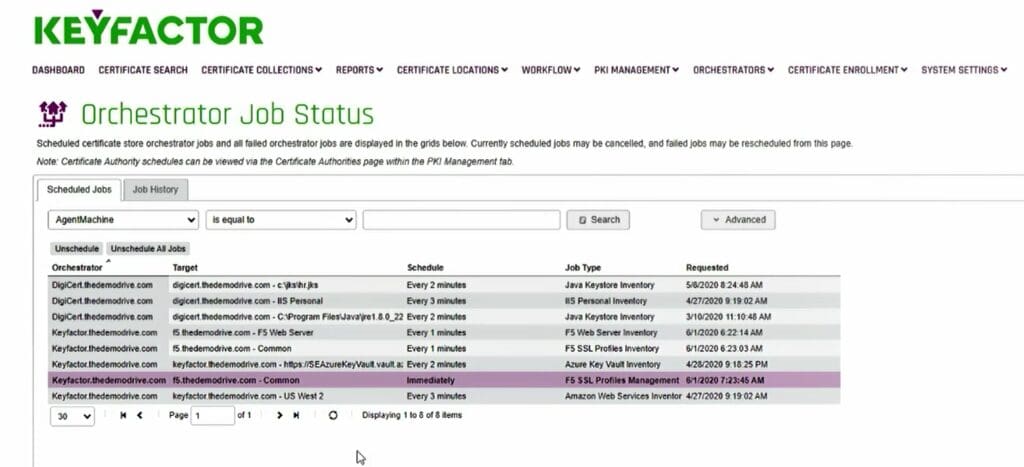
Next, we’ll look at the orchestrator job status. You’ll find the orchestrator jobs that have been scheduled and completed here (I.e. discovery, renewal, replacement, etc.).
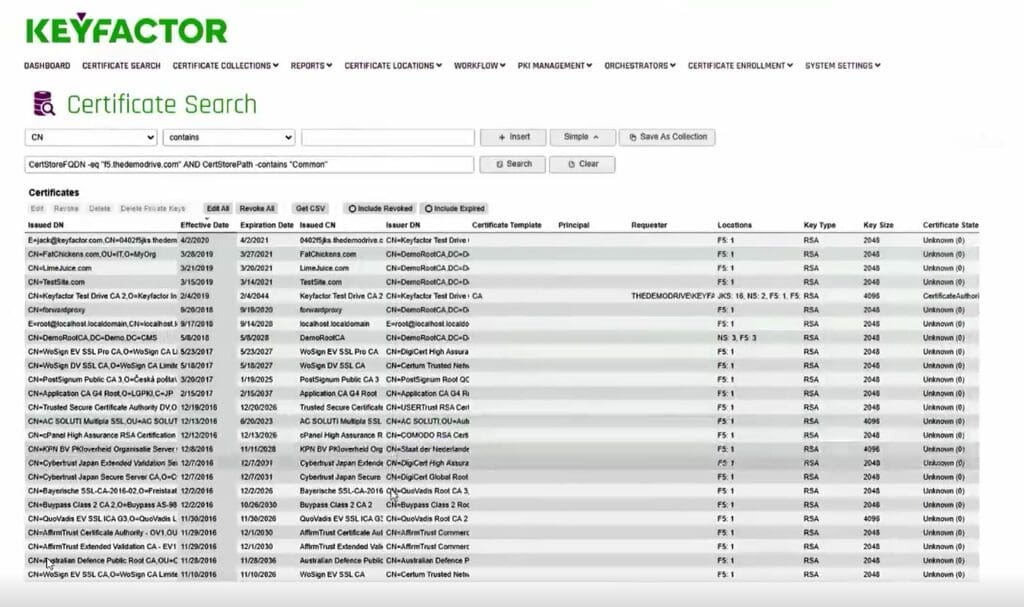
Go back to the certificate locations, certificate stores, and right-click on the common partition and view inventory to view the certificates that are on the F5 device.
Those certificates are now in our inventory database and can be interacted with.
How to Enroll & Issue F5 Certificates
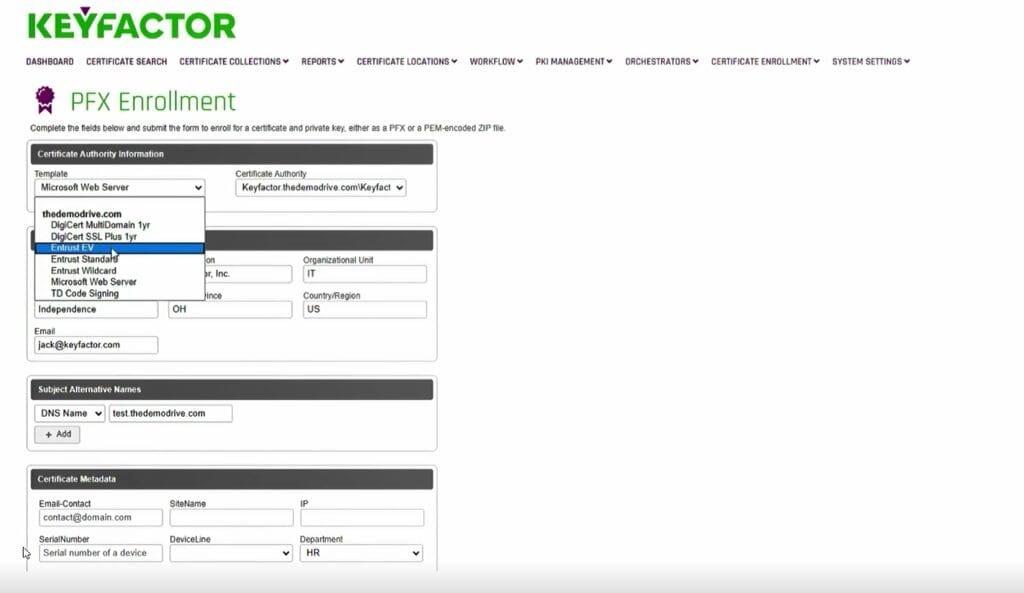
Next, let’s cover how to enroll a certificate via the self-service portal.
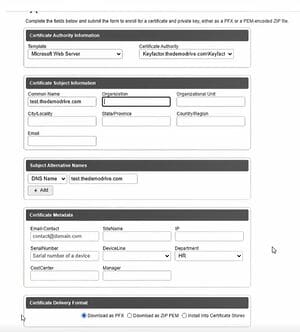
Start by selecting a template from a certificate authority (CA) configured in the Keyfactor Command platform. In this case, you can see we have DigiCert, Entrust, and Microsoft.
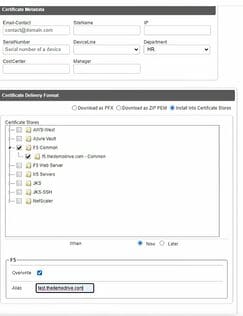
Enter a common name (domain name of the server that will receive the certificate). The other fields will be automatically populated based on our configured system settings. We can also enforce by default the input of the DNS subject alternative names.
Additional custom metadata can also be added to the certificate (e.g. application, certificate owner email, department, etc.).
Once completed, you can install the certificate directly into the certificate store that you select. In this case, the F5 Common container which is where you’ll find the specific F5 partition.
Select overwrite and use the alias (same as Common Name) which will allow the person on the F5 to see those certificates in the partition.
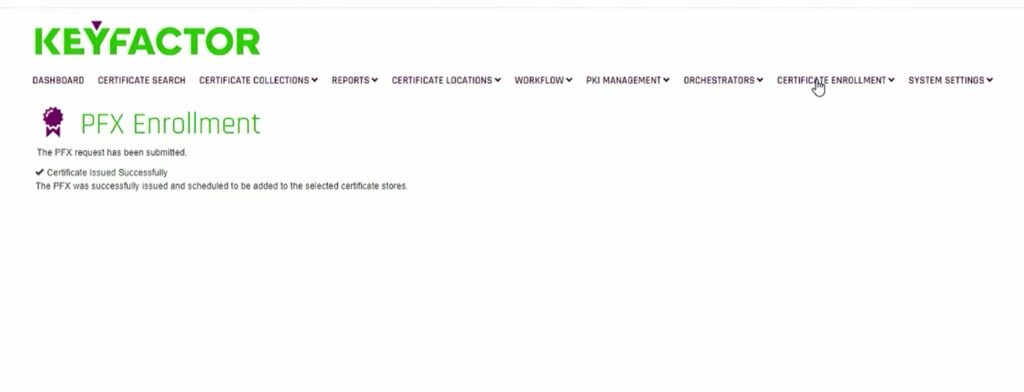
See the successful enrollment.
Now, check the orchestrator and look for the job that was submitted by Keyfactor Command.
In this case, you can see it’s been immediately submitted. Every minute, the orchestrator will connect with Keyfactor Command to check for and execute jobs.
Once the job is complete, it will be moved from the queue (scheduled jobs) and into the job history.
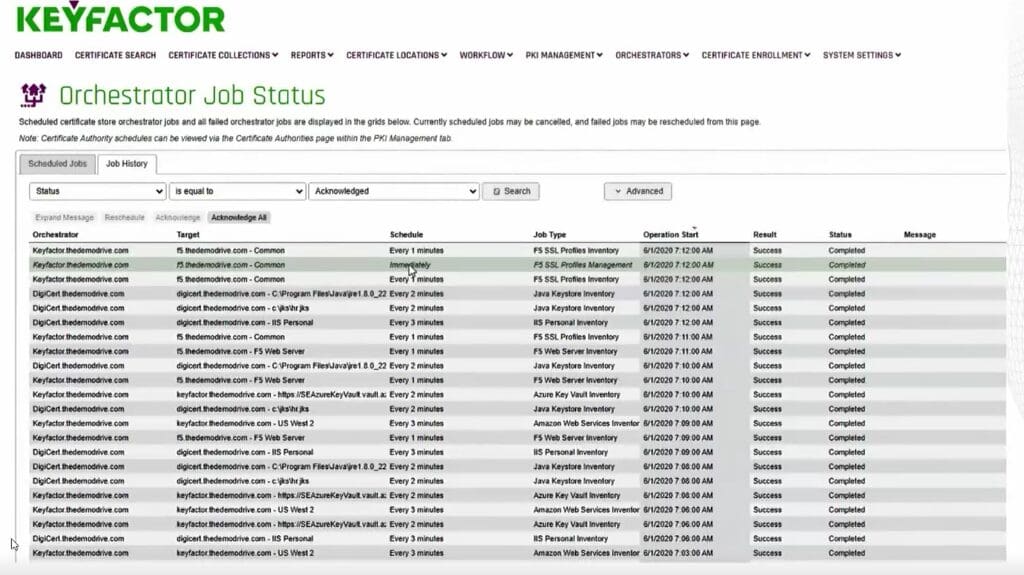
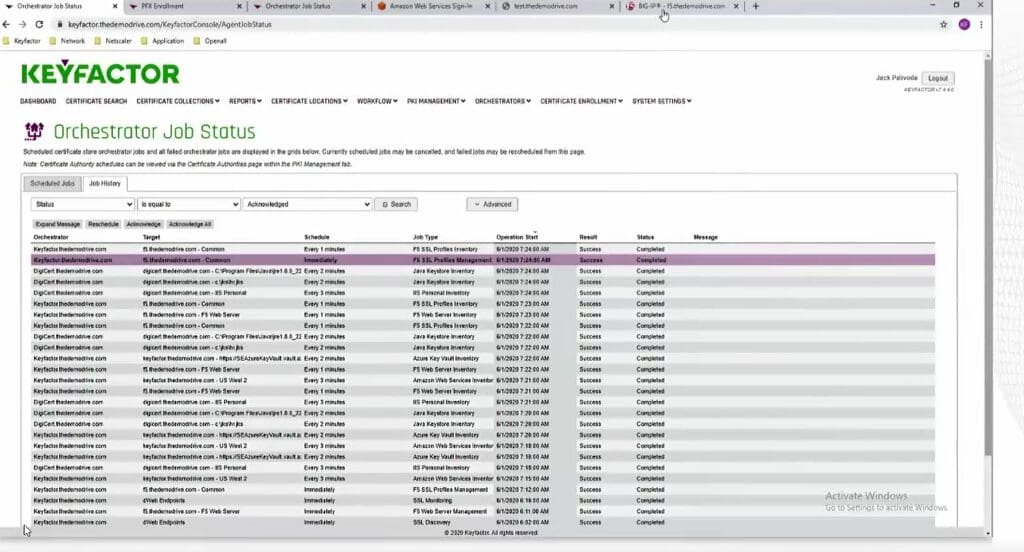
Now check the job history to see what happened. That immediate job should be completed successfully.
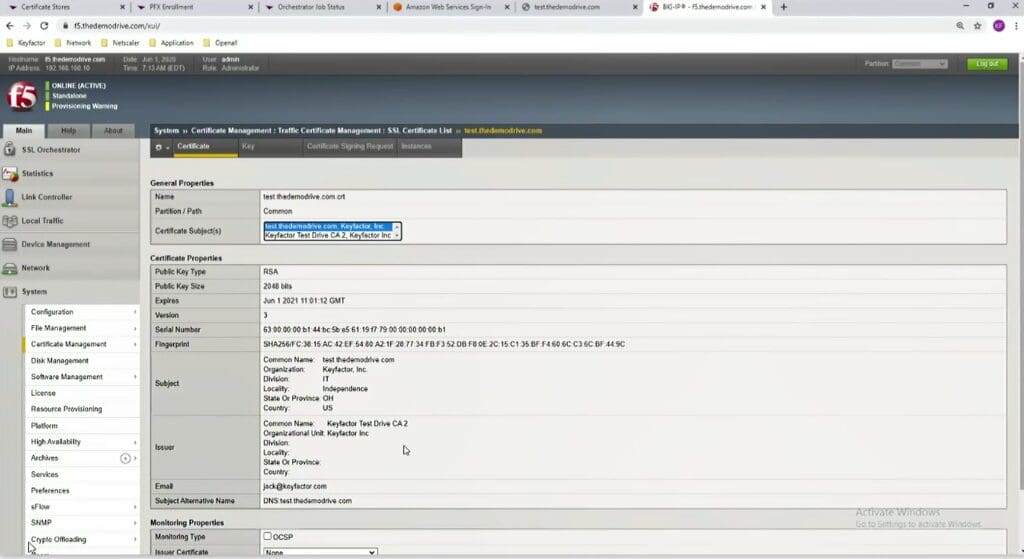
This next part isn’t necessary, but to show you that the certificate has been issued and provisioned to the F5 partition, you can login to the F5 device.
Go to System > Certificate Management > SSL Certificate List.
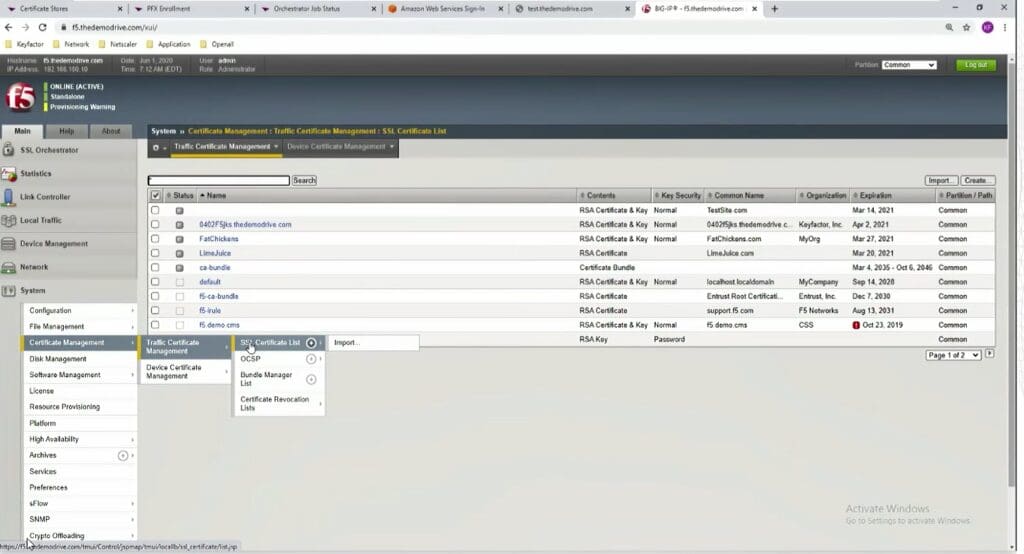
Below you can see that the certificate has been issued to the device.
How to Renew F5 Certificates
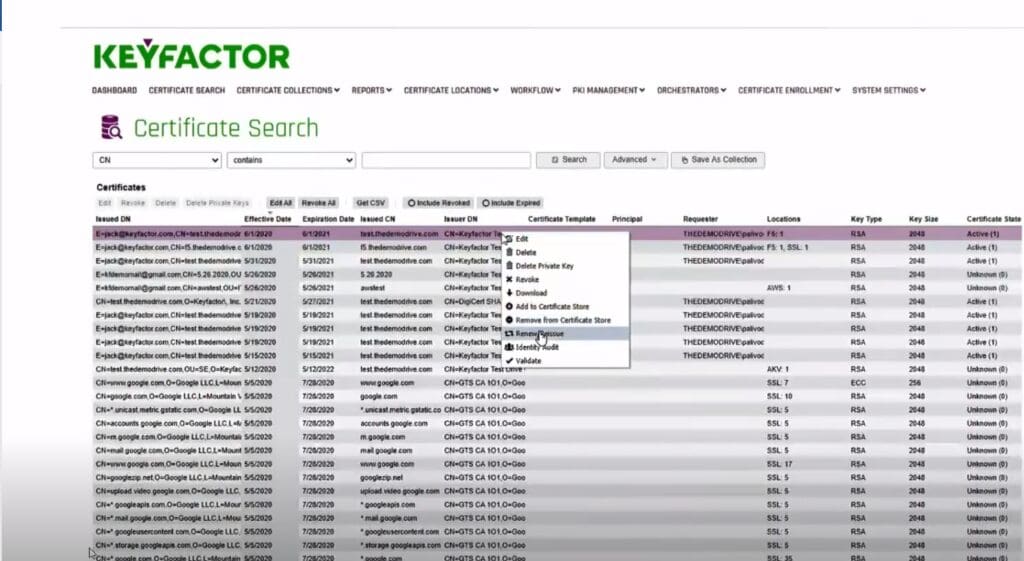
To renew a certificate, right-click the certificate in the admin portal and click renew.
Here you can see that we can also perform various other actions, such as revoking the certificate, editing metadata, deleting the private key, download the certificate, and more.
You can either click “Continue” to renew the certificate from the same Microsoft CA template, or you can click “Configure” to renew it from a new CA, change metadata, etc.
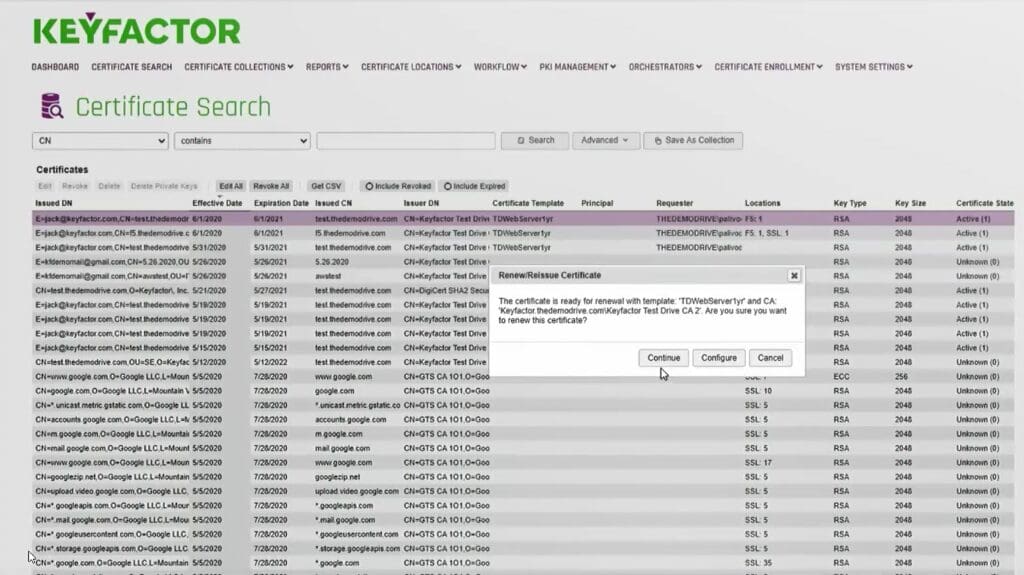
For this example, we’ll renew it from an Entrust CA.
The certificate will be installed into existing F5 locations, whether it was located on one partition or multiple devices and partitions.
In this case, we picked the Entrust standard template, which installs it to existing locations, whether it was on one or five locations.
Once you’ve submitted the enrollment, it will reach out to the Entrust CA, retrieve a new certificate from Entrust, and install it into those locations.
Once completed successfully, you can check the orchestrator jobs. Find the immediate job that was entered.

Refresh the page and see that job come off the queue.
Check the job history, and that job is, in fact, there. Its immediate and it’s been completed successfully.
Again, this step isn’t necessary, but to show that the certificate is updated on the BIG-IP device, we’ll go back to the Certificate Management > SSL List on the F5 BIG-IP device.
In this case, you’ll see the Entrust certificate has replaced the old Microsoft certificate, and the renewal/replacement completed successfully.